WorldShare Acquisitions Release Notes, February 8 2021
Release Date: February 8, 2021
Introduction
This release of WorldShare Acquisitions provides 6 new features and enhancements in addition to numerous bug fixes. These features will help you manage more complex workflows, including:
- Support for multiple shipping and billing addresses per branch/institution
- Manage renewal setting for subscriptions
- Freeze column headers on budget page
- Support for local resource invoice items in platform
- Duplicate order items in file do not fail EDIFACT invoice import
- MARC subfields each on their own line for MARC import
- New author field for EDIFACT order export
- New email address for staff email notifications
Many of these enhancements are the direct result of your feedback.
Recommended actions
For this release, we recommend that you review the following checklists and complete the relevant tasks so that you can adjust your policies and workflows and train your staff. These checklists identify updates that we have determined as significant for most institutions. We encourage you to review all of the items in the release notes to determine whether there are other items that might require additional action or follow up by your institution.
Administrative actions
These items require immediate action or decisions.
| Action |
|---|
|
None at this time. |
Follow-up actions
In an effort to keep your staff informed of new features and changes, you may also want to consider these items.
| Action |
|---|
|
Add business addresses for your institution and its branches to use as billing addresses. |
| Add additional shipping and billing addresses to your institution and its branches using the WorldCat Registry in Service Config. |
New features and enhancements
Support for multiple shipping and billing addresses for branch or institution
You can now select from multiple shipping and billing addresses for a branch or institution on the order in Acquisitions. This allows you to have vendors ship items and invoices to a location in your library that is either a part of a branch or institution or to a location that is separate from all designated branches. The Registry released the functionality to configure multiple shipping and billing addresses per branch or institution several months ago, but Acquisitions still only supported selecting the primary shipping address for a branch or institution. Additionally, Acquisitions did not support selecting a specific billing address but instead always used the primary business address for the main institution. Now, you can:
- Choose which shipping address you want to use for a branch/institution, if multiple options are provided
- Choose which billing address you want to use for a branch/institution, if multiple options are provided
- Set the billing address to be the same as the shipping address
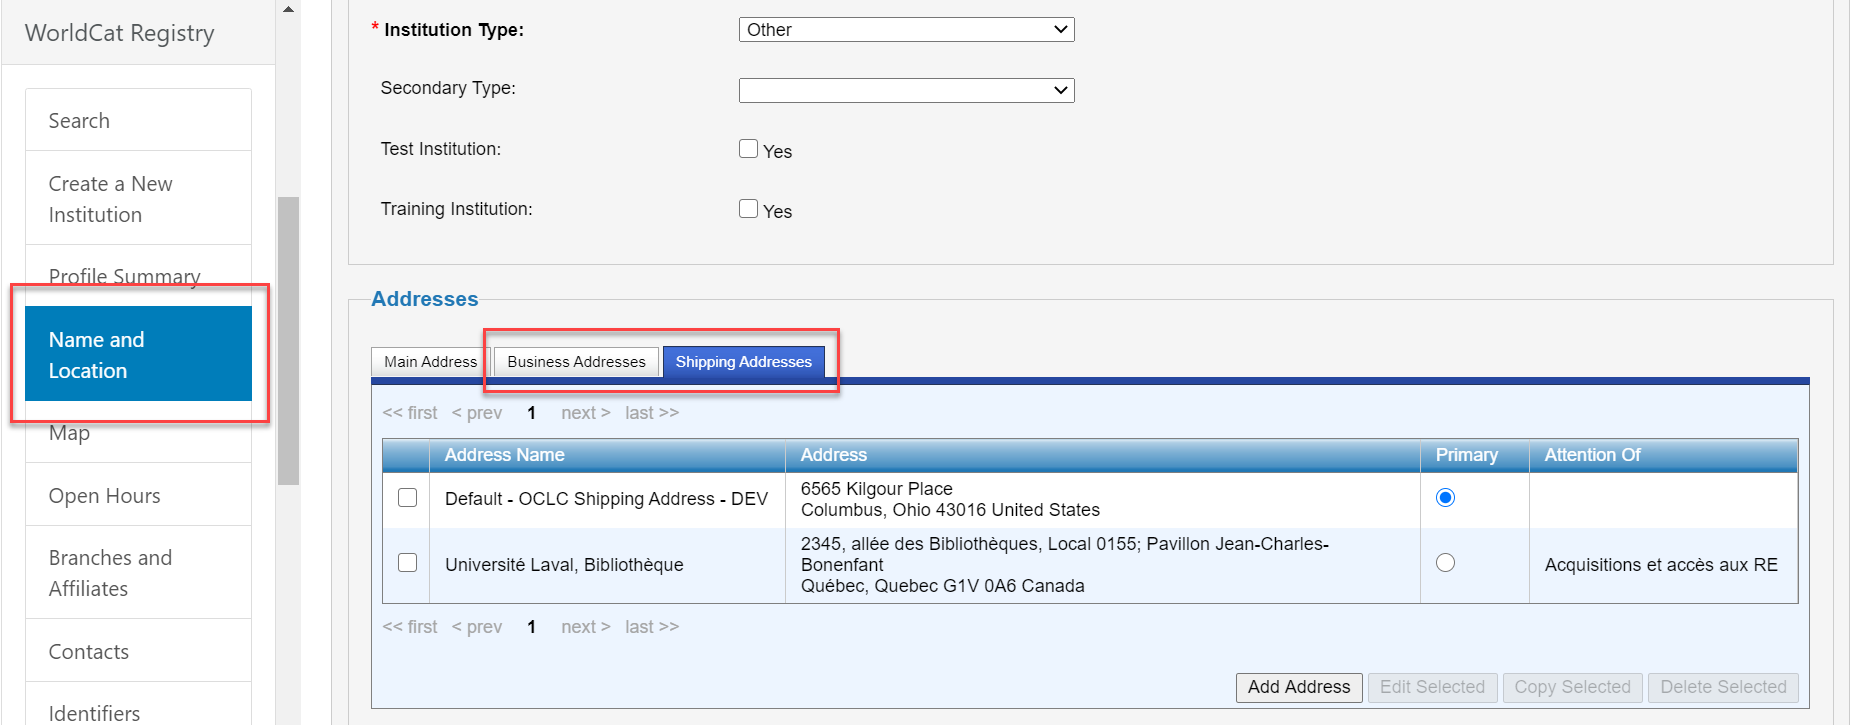
If you want to specify multiple locations for shipping or billing for a specific branch, you will need to use the WorldCat Registry within Service Config. You can edit the addresses on the Name and Location page.
Note: You must first authenticate and select the specific Branch or Institution you want to edit in the Registry.
The Shipping Address tab under Addresses allows you to configure multiple shipping addresses. Billing addresses can be configured from the Business Addresses tab. Some things to keep in mind when configuring shipping and billing addresses:
- Please make sure to provide a unique name for each address, so it can be identified in Acquisitions.
- If the physical street address is the same for two addresses, you can use the Attention field to distinguish between the addresses.
- Make sure to mark the address you most typically use for shipping or billing as the primary address.
If you want to specify a shipping or billing address that is not associated with a branch, you can choose your main institution to edit in the Registry. This will allow you to create shipping and billing addresses that comprise separate locations within the library but are not necessarily a branch of the library.
To select a specific shipping or billing address on an order:
- Open an order within Acquisitions (Orders > Orders)
- You will see a new section called Address Information under the Order Information section. This section can be closed if not needed.
- Within the Address Information section, you will see Shipping Type, Shipping Branch, and Shipping Address on the first line.
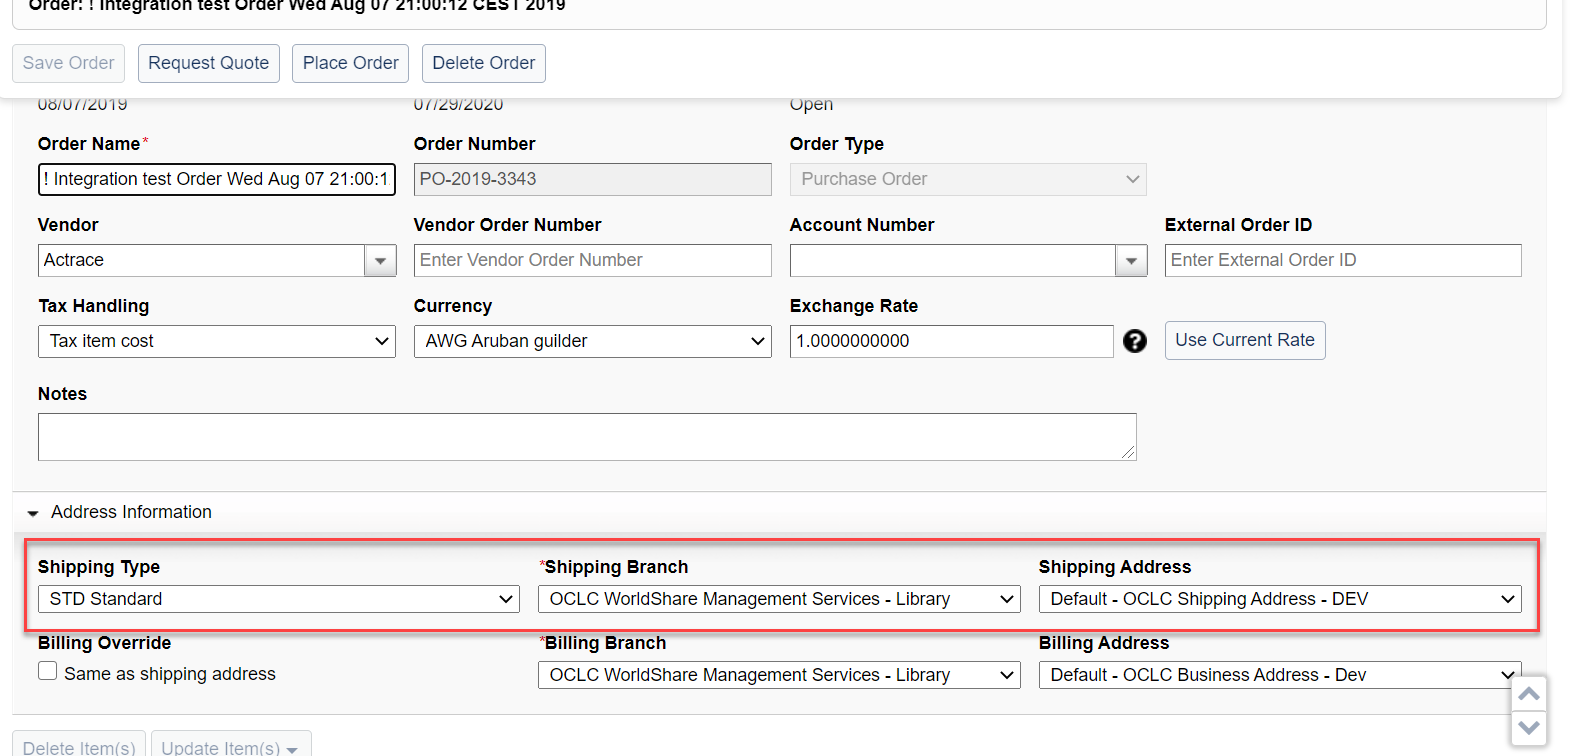
- To select a specific shipping address, first select the Shipping Branch. This can either be the main institution itself or any of its branches. Then select the Shipping Address. (The list of shipping addresses will depend on which Shipping Branch you have selected.)
- If you have configured only one shipping address for a branch and you have not given it a name, the name that will be shown is Default. You are free to leave the name of the shipping address as "Default" if you do not plan on having multiple addresses for a branch. However, if you plan on having multiple addresses per branch or institution, it is recommended to give each a unique and descriptive name.
- If you are not currently using the shipping address fields, you can leave them as-is. They will default to the same value that they had before this release.
- It is also okay if no shipping addresses are configured in the Registry for a branch/institution. The Shipping Address is not a required field. You can leave it blank. However, if you do, you will receive a blue information message at the top of the screen alerting you to the fact that the selected branch has no shipping address. You can place the order with this message displaying, or you can remove this message by either changing the Shipping Branch to one with a shipping address or add a shipping address for the selected branch/institution.
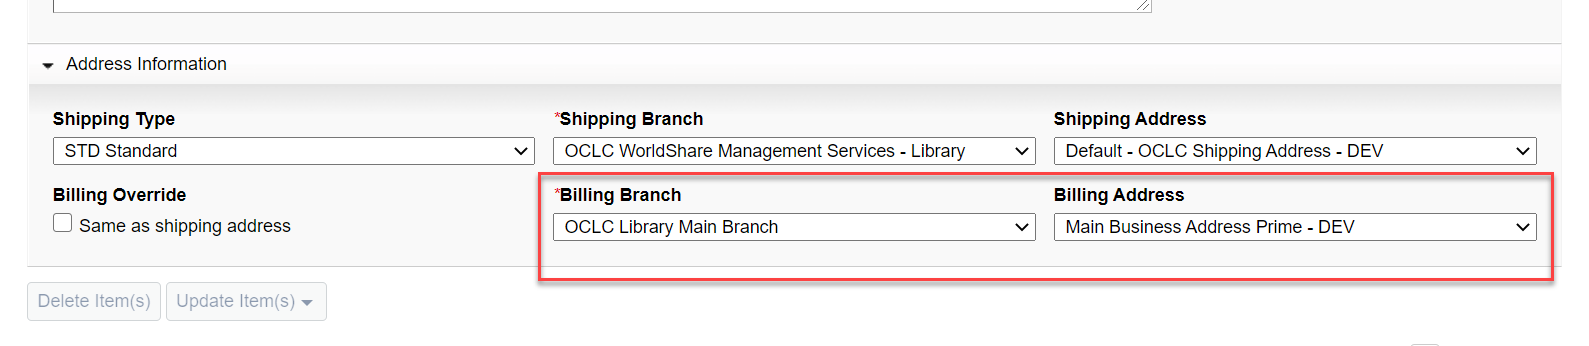
- The Billing Override field allows you to set the Billing Address to be the same as the shipping address. This will disable the Billing Branch and Billing Address dropdowns.

- To select a specific billing address, first select the Billing Branch. This can either be the main institution itself or any of its branches. Then select the Billing Address. (The list of shipping addresses will depend on which Shipping Branch you have selected.)
- If you are not currently using the billing address fields, you can leave them as-is. They will default to the same value that they had before this release.
- It is also okay if no business addresses are configured in the Registry for a branch/institution. The Business Address is not a required field. You can leave it blank. However, if you do, you will receive a blue information message at the top of the screen alerting you to the fact that the selected branch has no billing address. You can place the order with this message displaying, or you can remove this message by either changing the Billing Branch to one with a billing address or add a billing address for the selected branch/institution.
Manage renewal settings for subscriptions
You can now manage renewal settings for subscriptions in Acquisitions. This includes a setting that tells the system whether you plan to renew the subscription or not. This saves you time when renewing items by allowing you to mark items that you do not want to renew in advance. These items then get excluded from the renewal action when doing bulk renewal of many items. This will be especially important in the future as we enhance the bulk renewal functionality in WMS in coming months. With these enhancements, the ability to mark items that you want excluded from the renewal process becomes increasingly important. Previously, when you selected items to renew, you had to make sure to manually not select any items that you did not want to renew. Now, you can leave them selected, and the system will automatically exclude those items you have marked as "Do not renew."
To manage your renewal settings:
- Open a subscription order item. (This can be done from Orders > Order Items, or from the order page. Make sure to select an item, however, with the Acquisitions Type Subscription.)
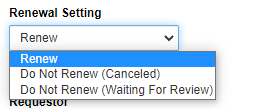
- From the Order Item Details page, you will see a new Renewal Setting field underneath the Start Date and End Date fields.

- This field has three options:
- Renew - Default setting. Item can be renewed as normal when using this setting.
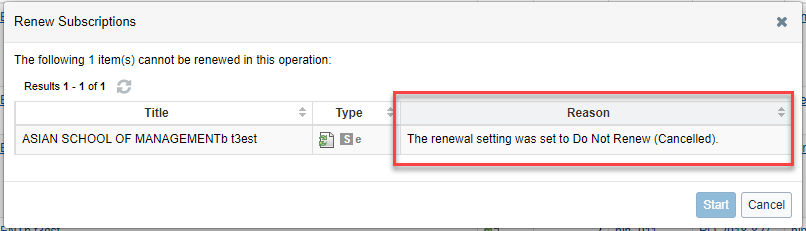
- Do Not Renew (Cancelled) - Indicates item should not be allowed to be renewed, because it is being cancelled.
- Do Not Renew (Waiting for Review) - Indicates item should not be allowed to be renewed, because it is currently under review and may be cancelled.
- Select one of these options and click Save at the top of the page.
Note: This will save this setting for not only this subscription order item, but all subscription order items that are linked to this subscription order item. For example, if you go to the Renewals tab on the order item details page, you will see earlier and later subscription order items that are linked to this subscription order item. If you open these, you will see they will all inherit the same renewal setting that you set for one of the order items.
- If you try to renew the item after you have set the renewal setting to one of the "Do Not Renew" options, you will receive a message stating the item cannot be renewed because it is marked as "Do Not Renew."
- To change the setting at any time, simply return to the order item details page, select a new value, and click Save.
Freeze column headers on budget page
You can now view the column headers on the budget page even when they should have scrolled off the page. This saves you time and effort reminding yourself which column is which on the page when you are viewing a long table of budget information. Previously, you would have to scroll back up to see the column headers, but now, the column headers display at all times on the budget page, even when you have scrolled down to the bottom of a long page.
Note: This feature does not work in IE11 due to lack of support for this feature in that particular browser. Users of IE11 will experience no change to their current experience.
To view frozen column headers on the budget page:
- Simply open a budget on the budget page (Budgets > Edit).
- Scroll down to view funds near the bottom of the page.
- You will notice the column headers remain anchored at the top of the page, even though you are viewing the bottom of a long page.

Support for local resource invoice items in platform
You can now create local resource invoice items for an invoice using the platform APIs. This allows you greater flexibility and supports more use cases when using the platform to create and manage invoices. One thing specifically this new service will support is the creation of Tax Rebates via the Platform. Tax rebates are often linked to local resource, rather than order items, and they are often credits or refunds rather than debits. Both features will be supported with this release.
To create a local resource invoice item:
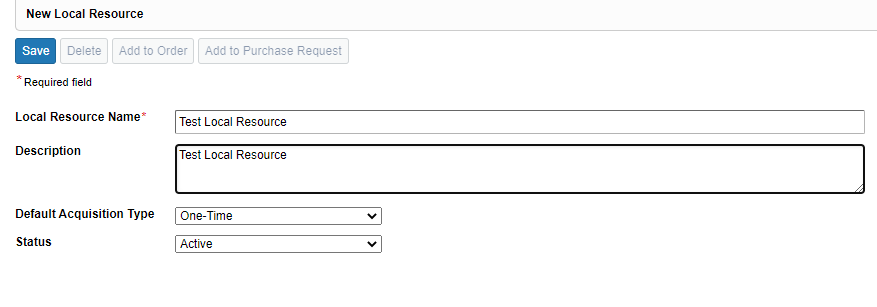
- Create the local resource using the user interface (Local Resources > Local Resources > Create Local Resource).
- Once the local resource is created, copy the unique ID for the local resource from the end of the page's URL.

- Use this local resource ID when calling the platform to identify the local resource to which to link the new invoice item. See OCLC Developer Network for instructions on how to create local resource invoice items.
Duplicate order items in file do not fail EDIFACT invoice import
You can now import multiple invoice items linked to the same order item without failing the entire file import. This save you the time and effort of removing these items from your file import or manually invoicing these items. Previously, if you uploaded an EDIFACT invoice file with multiple items pointing to the same order item, the system would fail the entire file. Now, only invoice items that exceed the limit of copies to invoice or are on a separate invoice will fail, not the entire file.
Note: Invoice items that exceed the limit of copies remaining to invoice will fail because you currently cannot invoice an order item a second time using an EDIFACT invoice import. Additionally, invoice items that point to the same order item but are on separate invoices cannot be processed because an order item cannot be invoiced on 2 separate invoices unless one of the invoices is first paid.
MARC sub-fields each on their own line for MARC import
You can now import MARC order data as well as MARC invoice and shelf-ready data using a file where each sub-field is on its own line. This allows greater flexibility in what kind of library and vendor files the library can upload to the import process. Previously, you could only upload data to the MARC order import and MARC invoice and shelf-ready import if each sub-field was on the same line.
For example, the file text below should work now:
=LDR 00246nam a2200145 a 4500
=981 \\$z17000152s
=990 \\$b834.78
=990 \\$c0.00
=990 \\$i0.00
=990 \\$s0.00
=990 \\$n1
=990 \\$f2020-04-21
=991 \\$m3025181
Whereas before, only the following would work:
=LDR 00246nam a2200145 a 4500
=981 \\$z17000152s
=990 \\$b834.78$c0.00$f2020-04-21$i0.00$m3025181$n1$s0
New Author Field for EDIFACT Order Export
You can now send author data to vendors in the appropriate IMD+L+010 field in the EDIFACT order file. Previously, we sent data in the IMD+L+065, which is not usually the correct field for author data. Now, author data is sent in both fields, so that vendors can choose which one to use when looking for author data.
New Email Address for Staff Email Notifications
You can now use the more appropriate Delivery / Notification email addresses for a user when notifying a user of an event. Currently, the user can receive email notifications when they import data or when an automated job runs. These email notifications were previously sent to the Library Record email address in the user record. However, now, the email notifications will be sent to the Delivery/Notification email address instead, which is what is used by other notification functionality in WMS. Additionally, this email address displays next to the name when searching for a user to select in the user autocomplete. (For example, when selecting a Reviewer, Requestor, or Notify user.)
Bug fixes
No more duplicate on-order Local Holding Records when receiving large orders
You can now receive copies from large orders without sometimes them leaving duplicat on-order Local Holding Records in the system. Previously, if a user placed an order with a large number of items, sometimes, the creation of on-order Local Holding Records would sometimes time-out, and the system would not store the on-order Local Holding Record ID in Acquisitions. Because of this, when the user received these items, the on-order LHR would not be replaced by a new received LHR but would be left in the system. This would result in duplicate on-order LHRs being left in the system for these large orders. This should not happen anymore, as we made it so that creating each on-order LHR was its own transaction rather than one transaction for the entire order.
Use of Custom Notification Text without Admin User Role
You can now use custom notification text when sending orders, claims, and cancellation messages even if your user does not have the Admin role. Previously, there was a bug that required the Admin role in order to use custom notification text with order, claim, and cancellation messages. Now, you can assign a lower role in order to a user that you want to perform these actions.
All Parts of Call Number Shown on Copies Screen
You can now view all parts of the call number on the Copies screen on the order item details page. Previously, only the class number showed on the Copies tab in the Call Number column on the order item details page. Now, the entire call number displays, including the prefix, suffix, and cutter.
Legal Deposit Receipts Shows Properly Formatted Receipt Text not Raw HTML
You can now view copies of old legal deposit receipts that have been sent. Previously, receipts were not being displayed properly. They would display the raw HTML code instead of the properly formatted legal deposit receipt message. Now, the message displays appropriately and can be viewed by users, as needed.
Important links
Support website(s)
Support information for this product and related products can be found at: