Install and upgrade for Relais ILL
Supported operating systems
- Windows XP Sp3
- Windows 7 (32bit and 64bit)
- Windows 8.1 (32bit and 64bit)
- Windows 10 (32bit and 64bit)
Note: If you are not using the Relais Hosted service, please contact Relais Support prior to upgrading to Relais 2021 for more detailed instructions.
Introduction
Starting with Relais 2019, a single build is used for all Relais products. At the beginning of the install/upgrade, you will be prompted to identify the product you use. The update will only apply to the changes relevant to the product you select.
Relais 2021, also includes auto-update software that will be installed on each workstation. This allows Relais to issue updates about which customers can be notified automatically. Once the notification is received the update can be downloaded and applied.
For Relais ILL customers installing to a shared network location, please be aware that the first workstation on which you install Relais 2021, you must select either the "Relais ILL (not hosted)" or "Relais ILL (hosted)" product as appropriate. Once that is complete, for all other workstations, select the 'Workstation' option from the list of products.
Notes
Important to note when installing Relais 2021.x:
- You still need to run an application server with Relais 2021.
- You can continue to run local versions of 2016, 2019, and 2020 with the hosted environment at version 2021.1.2, but you will not be able to do the following:
- Take advantage of the Turn Around Time features in the library, patron, and staff portal environments.
- Updated Post-to-Web functionality to make it more secure.
- We encourage libraries to update their local software to the latest version of 2021.1.2 so that you have all the current functionality at your disposal.
Download and unzip Relais 2021.x
Ensure that you have Administrator rights on the workstation(s) to which you are applying the update.
Relais ILL customers who use a shared network drive, be sure to install/update your primary environment first by selecting Relais ILL (hosted) or Relais ILL (non-hosted) from the product list.
Once this is done, install/update your remaining workstations by selecting Relais Workstation from the product list.
- Download the current build from the North American server.
- Unzip the build to the desktop of the workstation. The setup icon displays.

- Launch the setup icon and acknowledge any User Account Control messages.
Note: You no longer need to right-click the setup icon and 'Run as Administrator'. This requirement has been built into the application.
Initiate the installation
- Once extracted, the Welcome to the Relais 2021 Installation window appears.
- Click Next,
- Accept the License agreement terms on the next screen.
- Haga clic en Siguiente.
Select which product to install
- Enter the name of your organization (Optional).
- Select the appropriate Product from the drop-down list.
- Haga clic en Siguiente.
Notes:
- Product definitions are provided below.
- If you are not sure which product to install, please contact Support.
Caution:
Relais ILL customers who use a shared network drive, be sure to install/update your primary environment first by selecting Relais ILL (Hosted Service) or Relais ILL (not hosted) from the product list.
Once this is done install/update your remaining workstations by selecting Relais Workstation from the product list.
Specify the destination folder
By default, the destination folder is "C:\Relais2021".
You will need to change the destination folder if your institution has a specific location to which you have already installed a previous version of Relais. Use the Change... button to select the destination folder you wish to use.
Once you have selected the destination folder for Relais 2021 click on Next.
Note: If you do not see the drive on which Relais is installed it is because the Windows UAC (User Account Control) is preventing the installation package from seeing any network locations. Follow the solution outlined in this Microsoft article: https://technet.microsoft.com/en-ca/library/ee844140(v=ws.10).aspx
Installation
- Once you click Install, the install process starts. The entire process may take several minutes to complete.
- Click Finish.
Install/update all remaining workstations
For Relais ILL customers using a shared network drive once the primary environment is installed/updated with the appropriate Relais ILL product repeat Steps C through G on the remaining workstations. Select Relais Workstation from the product list.
If you use the default Windows “SQL Server” driver to create the windows ODBC connection after installing 2021.x, ensure that the “UseEncryption” option is set to N in your Relais.ini
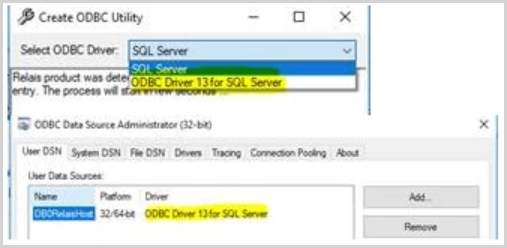
If you wish to enable the encryption of the database connection you must select a Native SQL server driver from the list of potential drivers when running the CreateODBC application.
Product Descriptions
|
Product |
Descripción |
|---|---|
|
Relais ILL (Hosted Service) |
|
|
Relais ILL (not hosted) |
|
|
Relais Workstation |
|
Additional Information
Issue running the CreateODBCexe utility on a staff workstation
This issue involves a scenario when a user with Administrator rights enters their credentials while running the CreateODBCexe utility on a staff workstation and the CreateODBC.exe utility completes successfully, but when they try to use Relais they still receive indications that the Relais applications cannot find the required ODBC entry.
In this situation, Windows has determined that the user running this utility does not have sufficient privileges to allow the CreateODBC.exe utility to complete successfully. This issue only occurs when running the CreateODBC.exe utility on Windows Vista and higher.
The user data sources are stored on the HKEY_CURRENT_USER tree in the windows registry.
If someone with Administrator rights has entered their credentials into this prompt, the CreateODBC.exe utility completes successfully but the ODBC setting is created under that user's profile and not the user that is currently logged into the staff workstation.
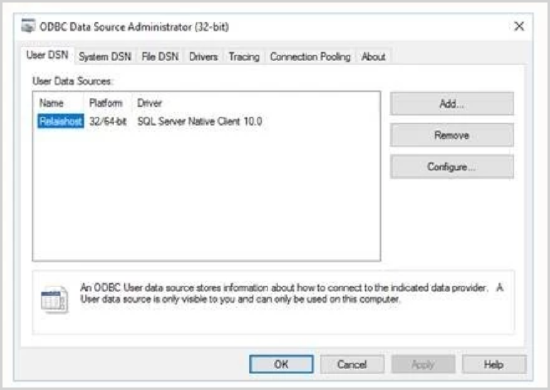
The Relais ODBC entry must appear under the “User DSN” tab in the windows “ ODBC Data Source Administrator”.

Temporarily add the user's account into the windows local administrators group. This ensures the user in question has sufficient privileges to allow the CreateODBC.exe utility to add the required entries into the HKEY_CURRENT_USER tree under their profile in the windows registry.
Once this is done you can remove the user account from the windows local administrators group.
Configure for an encrypted connection in 2021.x
Starting in Relais 2016.x, the build no longer contains the SQL Native Client driver due to security concerns expressed about including potentially outdated versions of the driver. By removing this component from the build, if the default Windows SQL Server driver is used to create the windows ODBC connection, users will not be able to set the "UseEncryption" option equal to "Yes" in the Relais Windows client. To configure your system to allow for encrypted connections the following must be done:
- Install the third party “Microsoft® ODBC Driver 13.1 for SQL Server” driver.
Link: https://www.microsoft.com/en-us/download/details.aspx?id=53339 - Run the CreateODBC.exe Utility and select the “ODBC Driver 13.1 for SQL Server” from the list of approved drivers:

Note: Any version of the Native SQL server driver will work in this scenario. The root issue is that the default Windows “SQL Server” driver does not support the encryption of the database correction.
